Blog
Connecting to and querying BigQuery from Python
Four steps to read data from your BigQuery warehouse directly into Python
In this post, you’ll learn how to connect to a Google BigQuery warehouse with Python. There’s a few different ways to do this, but we’ll use the official Google Cloud Python Client (google-cloud-bigquery). We’ll walk through:
1. Installing the Google Cloud Bigquery Python Client (google-cloud-bigquery) 2. Authenticating and connecting to your BigQuery data warehouse 3. Running a query! At this point, you’ve successfully connected to and queried BigQuery from Python, and you can write any query you want. Job done? Not quite. We’ll also cover: 4. Reading data from a BigQuery query into a pandas DataFrame Bonus: Writing a DataFrame back into a BigQuery table.
If you’re running through this live, it should only take you around 10 minutes to go from zero to successful query. Let's get into it!
🐍 Installing the Google Cloud Python Client
There’s nothing particularly special about the environment needed for this, so if you already know you have a working Python 3.6+ installation, you can skip to the next section, Installing the google-cloud-python package.
Prepping your Python environment
There are two likely scenarios here for how you're accessing Python:
a. You’re using a Jupyter notebook or a Jupyter notebook alternative:
You should be pretty much good to go in this case. If you want to make sure, you can run this Python command in a cell and look for a response that's >= 3.6:
from platform import python_version
print(python_version())
b. You’re using the terminal / command line / some other Python IDE directly:
Open up your terminal (Terminal app on Mac, command prompt or Powershell on windows, etc.)
Run
python --versionto check what Python version is installed. Mine prints outPython 3.9.12, but as long as yours is 3.6 or greater, you’re perfect.
If you get a command not found: python error, or your output is Python 2.x, try running python3 --version. If that works, then you have separate installations of Python 3 and Python 2, and for the rest of this tutorial you’ll need to substitute python3 for python and pip3 for pip in the example commands.
If python3 --version also does not work, then you don’t have Python installed. The easiest way to get this working is to download the official installer for your machine.
PS: We won’t go deep into the setup of virtual environments here, but if you’re doing a lot of Python work directly at the command line, you’ll want to read up on them. Virtualenv works well, and lots of people also like conda.
Installing the google-cloud-bigquery package
This is probably the easiest step of the whole tutorial! You just have to run one command to install the official BigQuery Python Connector:
pip install google-cloud-bigqueryIf you’re using a Jupyter notebook, add a ! before pip to let this command run.
!pip install google-cloud-bigqueryAnd if you had to run python3 -- version earlier to get a working output, you’ll run pip3 instead of pip to install the package:
pip3 install google-cloud-bigqueryThis pip install command will spin through a bunch of messages and progress bars, and maybe a few warnings about your “pip version” or various package deprecations. This is OK, and unless anything actually says “ERROR” in red, you can probably ignore it.
Now we’re ready to connect to BigQuery.
Authenticating and connecting to BigQuery
In this next part, we’ll be working with sensitive information: your BigQuery service account credentials. You shouldn’t ever store these directly in code or check them into git. You never know what you might unthinkingly do with that code— send it to a coworker to help, post it on Stack Overflow with a question, check it into a public git repo...
Storing BigQuery credentials
BigQuery service account credentials are provided as a JSON file, so we don’t need to stress about using environment variables or anything. Just make sure you keep this file somewhere safe, and don’t check it into git!
If you don’t already have a service account with BigQuery scopes, this is a nice resource that walks you through the steps to generate one.
Opening a connection to BigQuery
Now let’s start working in Python. Open a new Python session (either in the terminal by running python or python3, or by opening your choice of Jupyter notebook or Jupyter notebook alternative.
We start by importing the BigQuery connector library that we just installed:
from google.cloud import bigquery
from google.oauth2 import service_account
Next, we’ll open a connection to BigQuery. With this package, this means creating a client object that holds an authenticated session you can use to query data.
credentials = service_account.Credentials.from_service_account_file('path/to/your/service-account-file.json')

project_id = 'your-bigquery-project-id-here'
client = bigquery.Client(credentials= credentials,project=project_id)
If this all runs successfully, then congratulations— you’ve connected to BigQuery and are ready to run queries!
Running a query
BigQuery has some great public datasets that we can use to test our connection, so you can copy/paste this, but it’s pretty simple. You create a client.query() object with the SQL text you want to execute, and then fetch the result() from that query to run it.
query = client.query("""
   SELECT * FROM `bigquery-public-data.fda_food.food_events` LIMIT 1000
 """)

results = query.result()
for row in results:
	print(row)
You can replace that fda_food query with any SQL query you want to run.
But this isn’t the best way to work with lots of data— you don’t just want to look at the results, you want to do things with them! You could replace the print(row) command in that for loop to do something else... but there's easier ways to work with data in Python!
Reading data into a pandas DataFrame
Since most data analytics and data science projects use pandas to crunch data, what we really want is to get results from a BigQuery query into a pandas DataFrame. Luckily, the library we’re using makes that really easy to do.
All you need to do to fetch the query results as a DataFrame is add to_dataframe() instead of results(). You may need to also install the db-dtypes python package by running pip install db-dtypes.
query = client.query("""
   SELECT * FROM `bigquery-public-data.fda_food.food_events` LIMIT 1000
 """)

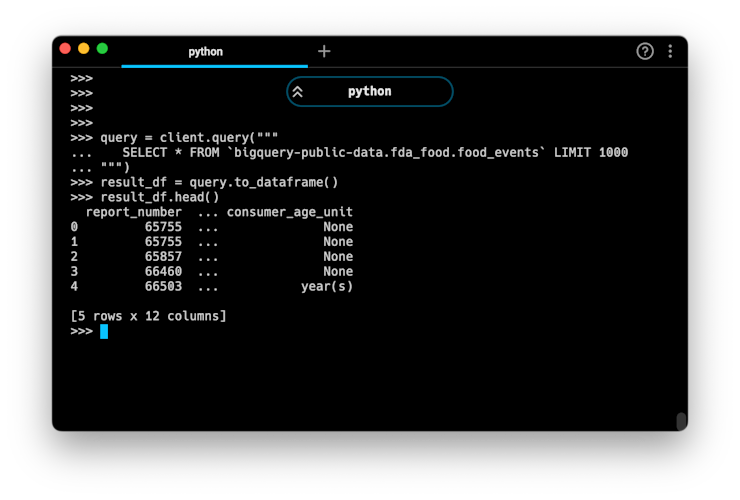
result_df = query.to_dataframe()
This will assign the results of your query to a pandas DataFrame called result_df. You can print a sample of the results to make sure it worked:
result_df.head()
And you’re off! You can use this method to execute any BigQuery query and read the results directly into a pandas DataFrame. Now you can use any pandas functions or libraries from the greater Python ecosystem on your data, jumping into a complex statistical analysis, machine learning, geospatial analysis, or even modifying and writing data back to your data warehouse.
Writing data back to BigQuery
Sometimes, an analysis isn’t one way, and you want to put the results of your work back into BigQuery. If you’ve already configured the google-cloud-bigquery package as described above, it’s not too much extra work to pipe data back into the warehouse.
To do this, you’ll need to install one more package: pyarrow. The BigQuery connector uses this to compress a DataFrame prior to writeback.
pip install pyarrow
Let’s say we start with the results of that previous query, and just want to write them to another table in our own project.
from google.cloud import bigquery
from google.oauth2 import service_account

credentials = service_account.Credentials.from_service_account_file('path/to/your/service-account-file.json')

project_id = 'your-bigquery-project-id-here'client = bigquery.Client(credentials= credentials,project=project_id)

query = client.query("""
   SELECT * FROM `bigquery-public-data.fda_food.food_events` LIMIT 1000
 """)

result_df = query.to_dataframe()

## you could do any manipulation to the dataframe you want here

table_id = 'your_dataset_name.new_table_name'

## optional: you can pass in a job_config with a schema if you want to define
## a specific schema
# job_config = bigquery.LoadJobConfig(schema=[
#     bigquery.SchemaField("field_name", "STRING"),
# ])

load_job = client.load_table_from_dataframe(
    df, table_id,
# job_config=job_config
)  # this will execute the load job

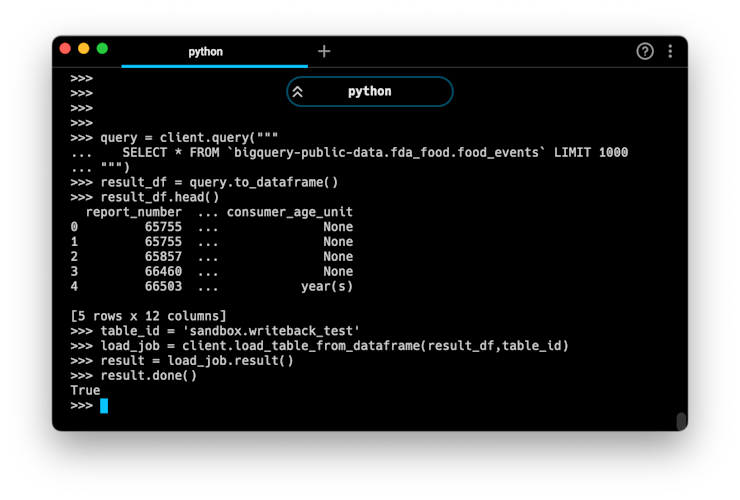
result = load_job.result()
result.done() # prints True if done
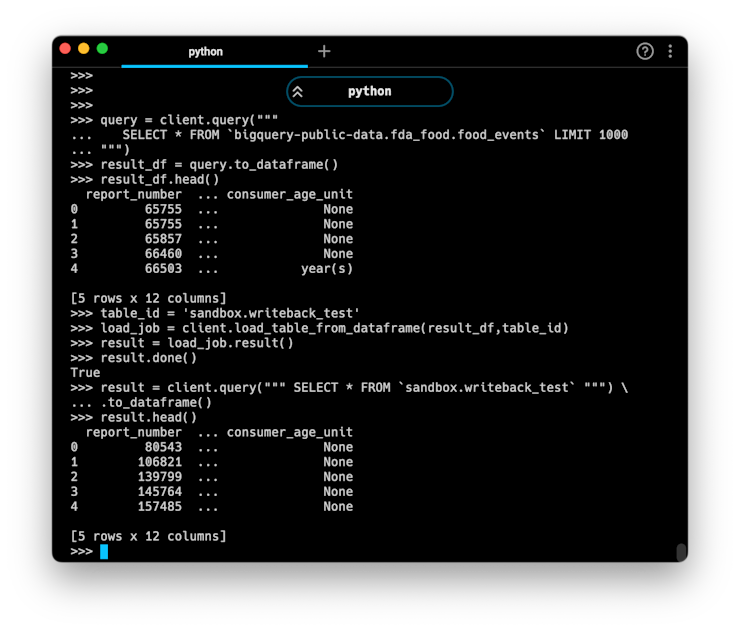
It’s easy to verify the success of this writeback job by running a quick query against the newly created table. Here’s everything all together:

This simple template can be repurposed to read or write any data on a Google BigQuery connection. For more (albeit a bit dense) information, you can check out the complete Google Documentation on using the BigQuery API.
Happy querying!
PS: If you use Hex (hint: you’re on our website right now!) you don’t have to deal with any of these contexts and cursors, and can just write SQL in a SQL cell and get the results as a DataFrame.