Blog
Deploying ML models to Snowflake with Modelbit and Hex
A simple and elegant way to deploy machine learning models

We're excited to offer built-in support for Modelbit, a tool that allows data scientists to deploy machine learning models directly from their data platforms. Data scientists can use Hex to rapidly build a machine learning model, and then deploy it to production with just one line of code using Modelbit.
In this blog post, we'll do just that. We'll start by creating a simple classification model in Hex that predicts how many baskets an NBA player will score in a game. Once trained, we'll deploy our model to Modelbit so that we can make predictions on some unseen data. Without further ado, let's get started!
Building an ML model
To pull our data into Hex, we'll import the Snowflake data connection that contains our NBA stats data, then write a quick query to return all of the rows. You'll notice that the table is automatically returned to us as a DataFrame and displayed— if you want to download the data to try this yourself, you can use the download button in the bottom right hand of this embedded cell to do so.
Since we're trying to predict a player's start_position , we've intentionally removed any rows where start_position is null. In machine learning, models are trained to "learn" a function that can map a set of features onto the desired target. In this training dataset, we exclude the target column since we want to try and predict it! We already know our target, so let's select some features from our dataset that might help us make predictions.
Specifically, we'll look at:
- How many three-point shots a player attempted:
FG3A - How many points they scored:
PTS - How many rebounds they got:
REB - How many shots they blocked:
BLK - How many turnovers they committed:
TURNOVERS
Having selected our features, we have one more step to complete before we can start training— encoding our target column. Machine learning models don't often play well with raw text, so we'll need a method that can transform text into numbers. For this, we've chosen a label encoder. Label encoders work by assigning a number to each unique label, starting at 0 and increasing by one until the last label is assigned a number. For example, we'd transform ['A', 'B', 'C', 'A'] into [0, 1, 2, 0]. This format is both smaller in size, and way easier for computers to manipulate.
The model we've chosen to use is an XGBoost XGBClassifier, which is a classification model that aims to avoid overfitting. In plain English— this model learns to classify targets and is less prone to accidentally becoming overly complex and specific to unintentional artifacts of the training data. Let's look at the code implementation of these steps.
Looks like we got a 62% accuracy score, when evaluated on the testing data! Not too bad, so let's ship this model to production 🚀. To deploy our model, we need to take this logic and bundle it up into a function that we can deploy to Modelbit. We’ll start by writing a Python function that will do the inference:
This function takes our features as its arguments, then uses them to create a Pandas DataFrame. Then, with our newly trained model, we can use the function to predict, decode, and return a players position. Let's see it in action.
A player that takes 15 three pointers, scores 30 points, has only one rebound, no blocked shots, and 5 turnovers is probably a Guard. Whereas a player with no three point attempts or turnovers, but 3 points, 10 rebounds and 4 blocked shots is probably a Center. Makes sense!
Deploying to Modelbit
Now that we have a model that's capable of predicting position with decent accuracy, it's time to deploy it. We'll import the modelbit package and log in to Modelbit by calling modelbit.login() .
With that imported and a connection established, we can call mb.deploy to deploy our inference function to Modelbit.
Modelbit will capture the function code and its dependencies (the encoder and the model itself) and ship them all to the cloud. The remarkable thing about this is that models uploaded to Modelbit can be easily called from anywhere— even directly from Snowflake.
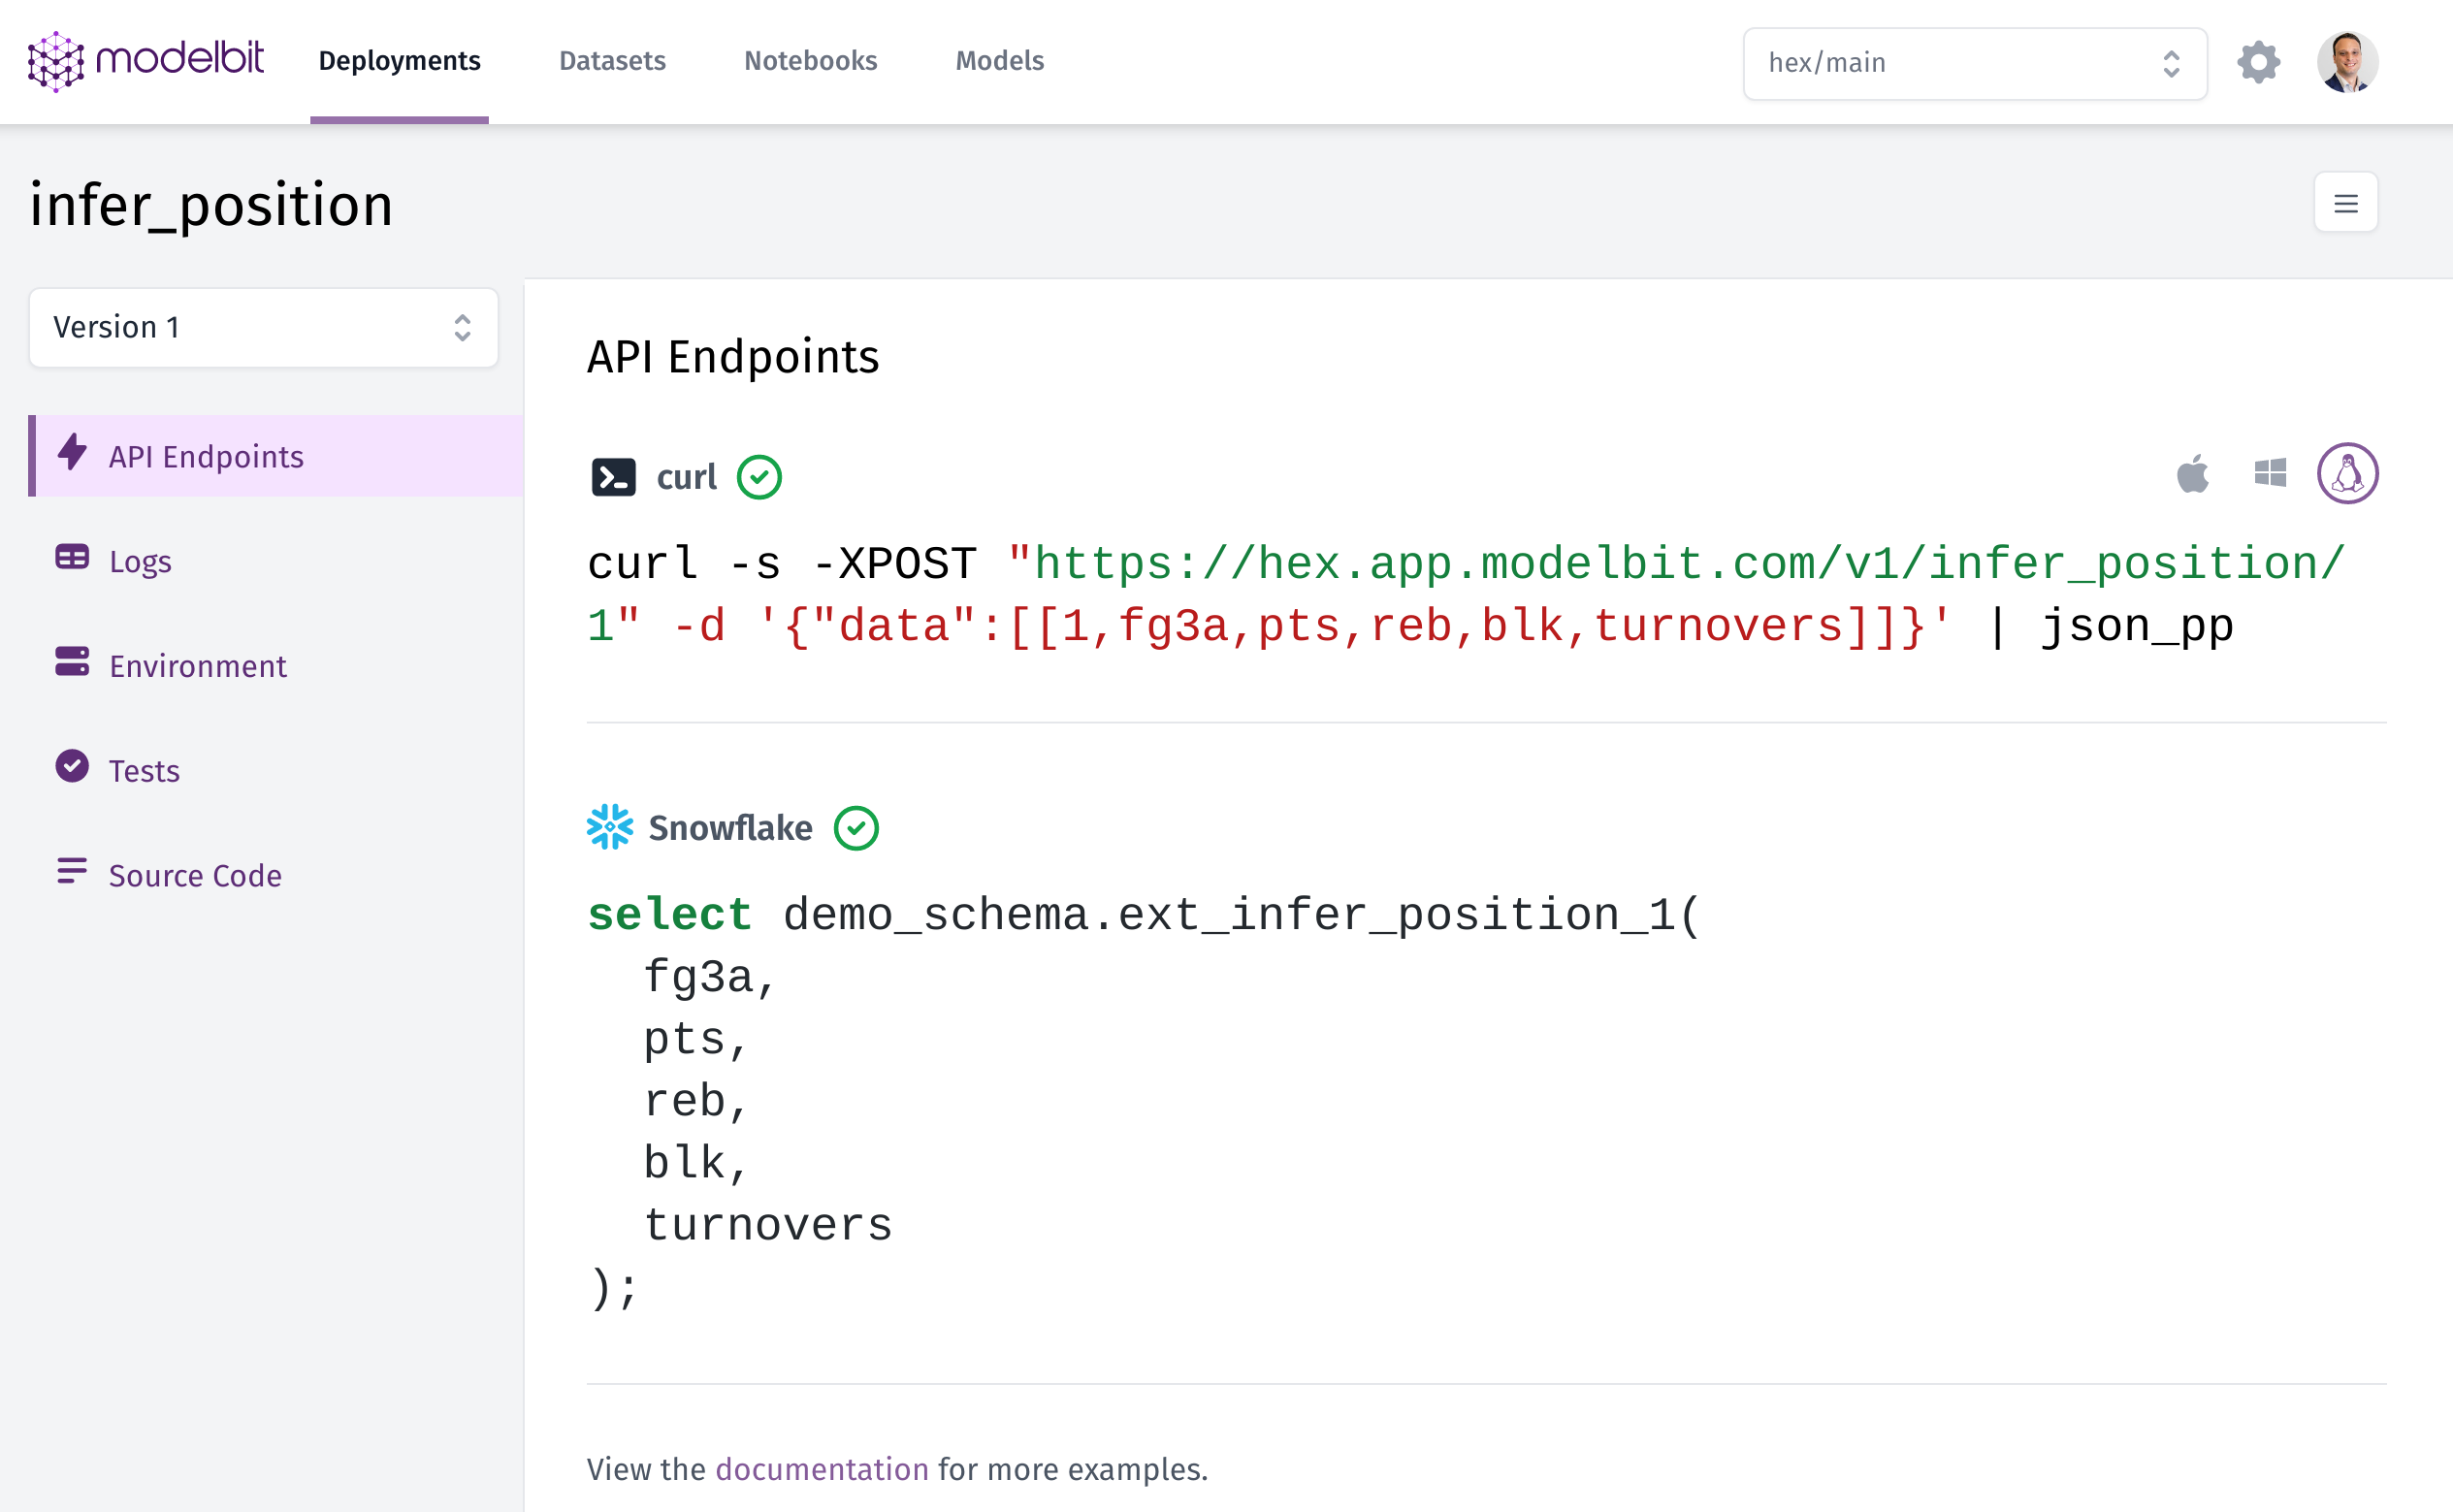
If we click the link in the deploy response, we’ll head to Modelbit, where we can see the model that was captured, its dependencies, and examples of how to call it via a REST API as well as from Snowflake:
Making predictions
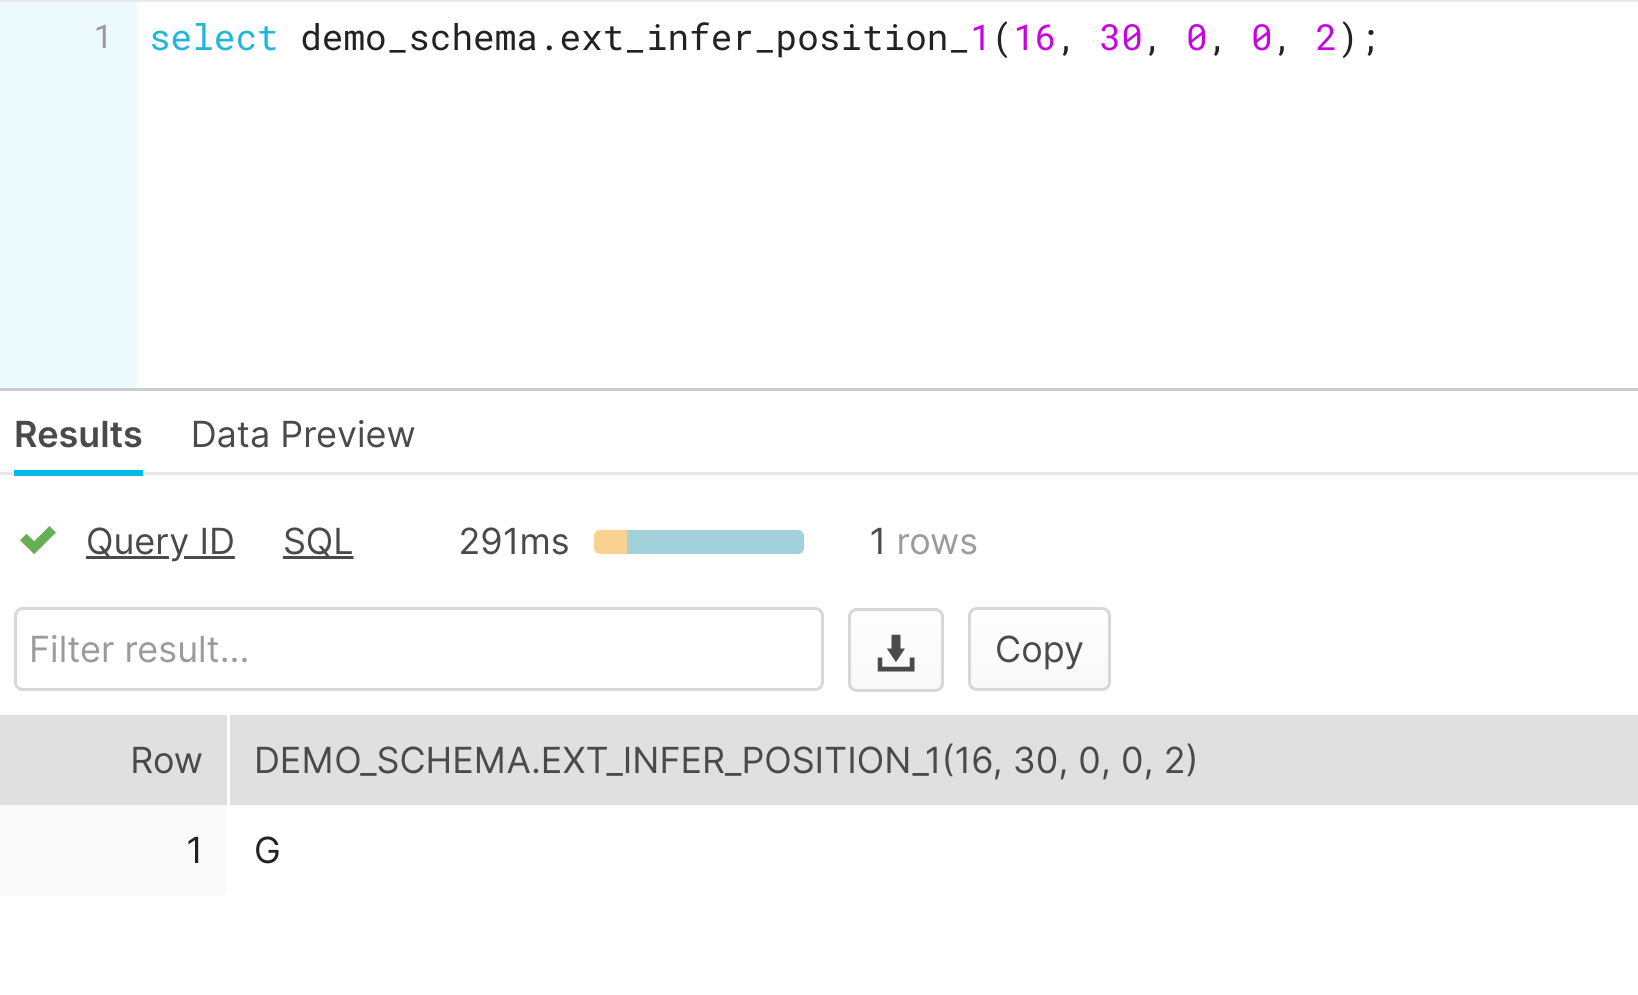
Let's test it out in Snowflake. Modelbit gives us a handy SQL function we can call to get our inferences: ext_infer_position_1(). We can run a simple query using that function and pass in our predictive features, which could also be passed directly from another query or Snowflake table. As we can see, we’re getting the same predictions in Snowflake that we got moments ago in Python.
Now the XGBoost model that we built and trained moments ago in Hex is available to use right in Snowflake at effectively limitless cloud scale. This is especially useful for running a prediction every time a new row is inserted in a table, every time a dbt model is built, or when building views on top of a raw table.
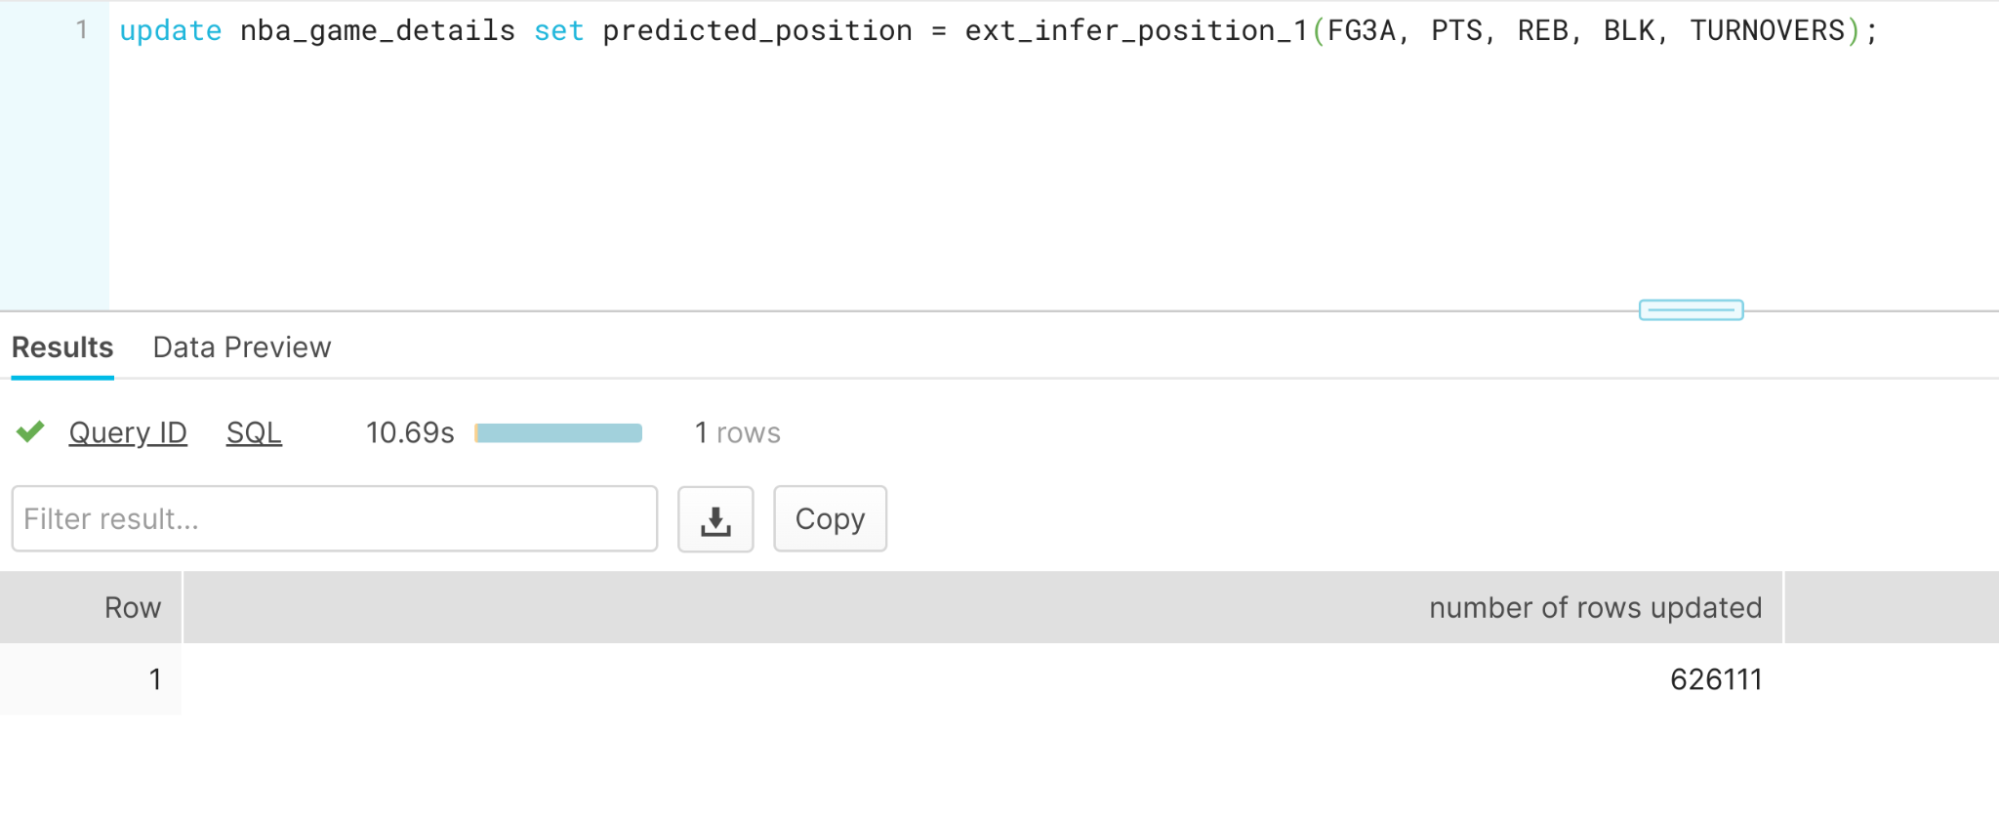
With just one update call, we made and stored over 600,000 predictions in less than 11 seconds, without having to write any extra code or provision any cloud infrastructure or GPUs.
That's the power of Hex and Modelbit. Exploring data and creating a machine learning model in Hex takes just a few minutes, and deploying it to Modelbit means that in just a few seconds, you can be making batch predictions right in your database with simple, straightforward SQL commands. No GPUs, no mucking around with servers or lambda functions, just quick and easy predictions in the cloud!